Introduction
OneMart Admin & Web is the back-office management panel and customer-facing storefront for the DayOneMart single-vendor e-commerce platform. Built on Laravel 12 with a Vue 3 / Inertia.js frontend, it ships as a single deployable application that serves three distinct surfaces:
- Admin Panel — Full business management interface (orders, products, users, analytics, settings)
- Customer Storefront — SEO-friendly web shopping experience served via Inertia
- REST API — Versioned JSON API consumed by the Flutter Customer App and Deliveryman App
Technology Stack
| Layer | Technology | Version |
|---|---|---|
| Backend Framework | Laravel | ^12.0 |
| PHP Runtime | PHP | ^8.2 |
| Frontend Framework | Vue 3 + Inertia.js | ^3.5 / ^2.1 |
| Build Tool | Vite | ^7.0 |
| CSS Framework | Tailwind CSS | ^4.0 |
| UI Components | Shadcn Vue / Reka UI | ^2.2 / ^2.6 |
| Authentication | JWT (tymon/jwt-auth) | ^2.2 |
| 2FA | Google TOTP (pragmarx/google2fa) | ^9.0 |
| Real-time | Firebase Cloud Messaging (Push Notifications) | ^10.14 |
| Performance | Laravel Octane (Swoole) | ^2.12 |
| Storage | AWS S3 / Local | — |
| Payments | Stripe + multiple gateways | ^17.6 |
| Charts | Chart.js + ApexCharts | — |
| Maps | Google Maps JS API | — |
| Rich Text | Tiptap v3 | — |
| i18n | i18next + i18next-vue | — |
| Firebase | Firebase JS SDK | ^10.14 |
Project Folder Structure
/app
├── Console/
├── Enums/
├── Events/
├── Http/
│   ├── Controllers/
│   │   ├── Api/              ← REST API v1 controllers
│   │   ├── Payment/          ← Stripe, PayPal, Razorpay, etc.
│   │   ├── Web/              ← Inertia page controllers
│   │   ├── InstallerController.php
│   │   └── UpdaterController.php
│   ├── Middleware/
│   ├── Requests/
│   └── Resources/
├── Jobs/
├── Mail/
├── Models/
├── Services/
└── Utils/
    ├── constants.php
    ├── formatter.php
    └── translation.php

/resources/js
├── AdminPanel/               ← Admin Vue application
│   ├── Layouts/
│   ├── Pages/
│   │   ├── Analytics/
│   │   ├── Authentication/
│   │   ├── Dashboard/
│   │   ├── Food/
│   │   ├── Orders/
│   │   ├── Promotion/
│   │   ├── Reports/
│   │   ├── Settings/
│   │   └── ...
│   ├── components/
│   ├── composables/
│   └── locales/
└── StoreFront/               ← Customer web Vue application
    ├── Layouts/
    ├── Pages/
    │   ├── Homepage/
    │   ├── Menu/
    │   ├── Checkout/
    │   ├── Profile/
    │   └── ...
    ├── components/
    └── composables/

/routes
├── api/v1/
│   ├── admin.php
│   ├── customer.php
│   └── deliveryman.php
├── web/
│   ├── admin.php
│   ├── storefront.php
│   ├── installer.php
│   └── updater.php
└── payment.php

/lang          ← en, bn, hi, ar, es translations
/public        ← Document root — point domain here
System Features
Dashboard & Analytics
- Real-time business overview with live order stats and revenue counters
- Sales reports — daily, weekly, monthly, custom date range
- Category performance analytics
- User activity reports and hourly trend charts (Chart.js + ApexCharts)
- Top-selling products and revenue breakdown
Order Management
- Full order lifecycle: Pending → Confirmed → Processing → Handover → Picked Up → Delivered
- Assign / unassign deliveryman per order
- Edit order items, delivery address, and customer notes
- Cancel orders with reason tracking
- Refund workflow — approve or reject refund requests
- Invoice generation and download (PDF)
- Payment status management
- Bulk order actions
Product & Menu Management
- Product items with variations, add-ons, stock levels, and pricing
- Categories and sub-categories with images
- Labels (e.g. New, Best Seller, Veg) and Cuisines
- Menu Types (e.g. Breakfast, Lunch, Dinner)
- Bulk CSV / Excel import and export
- Toggle product availability and featured status
Marketing & Promotions
- Coupon codes with usage limits, minimum order value, and expiry
- Flash Sales — time-limited promotional campaigns with countdown timers
- Loyalty points — earn on orders, redeem at checkout, configurable rules
- Push notifications via Firebase Cloud Messaging
- Marketing tools & sales popup configuration
- Newsletter subscriber management
User Management
- Employees — CRUD, role & permission management (RBAC)
- Deliverymen — CRUD, working hours, earnings tracking
- Customers — CRUD, wallet balance, order history, bulk actions
- Wallet transactions overview
Website & Content
- Page builder for About, Privacy Policy, Terms & Conditions, Refund, Cancel Policy
- Blog management (create, publish, draft)
- FAQ management
- Social media link configuration
- Homepage banner and featured sections control
Communication
- Live chat between admin ↔ customer and admin ↔ deliveryman
- Order-specific customer support
- Push notification campaigns with target selection
Settings & Integrations
- Payment gateways: Stripe, PayPal, Razorpay, Flutterwave, and more
- SMS gateways: Twilio, Nexmo (Vonage)
- Email: SMTP, Gmail, AWS SES, Mailgun
- Firebase: Push notifications, social auth configuration
- Social login: Google, Facebook, Apple
- Google Maps: Geocoding, autocomplete, direction APIs
- Tax rates, currency configuration
- Delivery charge zones and rules
- Cookie consent configuration
- Environment variable management (in-app editor)
System & Security
- Built-in database backup & restore
- Application cache management
- Activity logs
- RBAC — fine-grained employee role permissions
- Two-Factor Authentication (TOTP) for admin accounts
- reCAPTCHA v3 on login
- JWT-based API authentication
Installer & Updater
- Built-in graphical installer wizard at
/install - Built-in updater at
/updater— no SSH required for updates - Purchase code verification
Prerequisites
Server Requirements
| Requirement | Minimum | Recommended |
|---|---|---|
| PHP | 8.2 | 8.3+ |
| MySQL / MariaDB | 8.0 / 10.4 | 8.0+ / 10.6+ |
| Web Server | Nginx / Apache | Nginx + Octane |
| RAM | 1 GB | 2 GB+ |
| Disk Space | 500 MB | 2 GB+ |
| Node.js | 18 | 20+ LTS |
| Composer | 2.x | Latest |
Required PHP Extensions
The installer wizard automatically verifies all of these on the first step:
PDO_MySQL— MySQL database driverSodium— encryption and hashingMbstring— multibyte string supportOpenSSL— secure connectionscURL— external HTTP requestsFileinfo— file type detectionBCMath— arbitrary precision mathXML— XML parsingZip— archive handlingGDorImagick— image processingSwoole(optional) — required only for Laravel Octane
The installer also checks that Composer, Node.js, file_get_contents(), and symlink() are available.
External Services (Recommended)
- Firebase Project — push notifications, social auth, crashlytics
- Google Maps API Key — geocoding, place autocomplete, directions
- SMTP / Mail provider — transactional emails (Gmail, SES, Mailgun, etc.)
- AWS S3 bucket (optional) — file and image storage instead of local disk
Quick Start
Pre-flight Checklist
- PHP 8.2+ with all required extensions installed
- Composer 2.x installed globally
- Node.js 18+ and npm installed
- MySQL/MariaDB server running and accessible
- Empty database created for the application
- Web server (Nginx or Apache) configured
- Domain / subdomain pointed to the server
- Purchase code ready
5-Step Quick Install
-
Extract the archive Extract the downloaded ZIP to your server's web directory (e.g.
/var/www/onemart). Point your Nginx/Apache document root to the/publicfolder. -
Set permissions
chmod -R 775 storage bootstrap/cache
chown -R www-data:www-data .
-
Install dependencies & prepare environment The ZIP does not include the
vendor/folder — runcomposer updateto generate it before continuing.composer update --optimize-autoloader --no-dev npm install npm run build cp .env.example .env php artisan key:generate php artisan jwt:secret
-
Run the installer wizard Visit
https://yourdomain.com/install/requirementsin your browser and follow the 5-step on-screen wizard (details below). -
Post-install production optimization
php artisan config:cache
php artisan route:cache
php artisan view:cache
INSTALLED=true flag is written to your
.env, APP_ENV is set to production,
APP_DEBUG is set to false, and the installer route is
automatically disabled for security.
Installation Process
Pre-Install: Create a MySQL Database
Create a MySQL database and user before running the installer wizard:
CREATE DATABASE onemart CHARACTER SET utf8mb4 COLLATE utf8mb4_unicode_ci;
CREATE USER 'onemart_user'@'localhost' IDENTIFIED BY 'strong_password_here';
GRANT ALL PRIVILEGES ON onemart.* TO 'onemart_user'@'localhost';
FLUSH PRIVILEGES;
Pre-Install: Environment & Dependencies
vendor/ folder.
You must run composer update after extracting the ZIP to generate it,
otherwise the application will fail to boot.
Copy the example environment file, generate keys, and install dependencies:
cp .env.example .env
php artisan key:generate
php artisan jwt:secret
composer update --optimize-autoloader --no-dev
npm install && npm run build
Web Installer Wizard
Navigate to https://yourdomain.com/install/requirements in your browser. The wizard guides you through 5 steps:
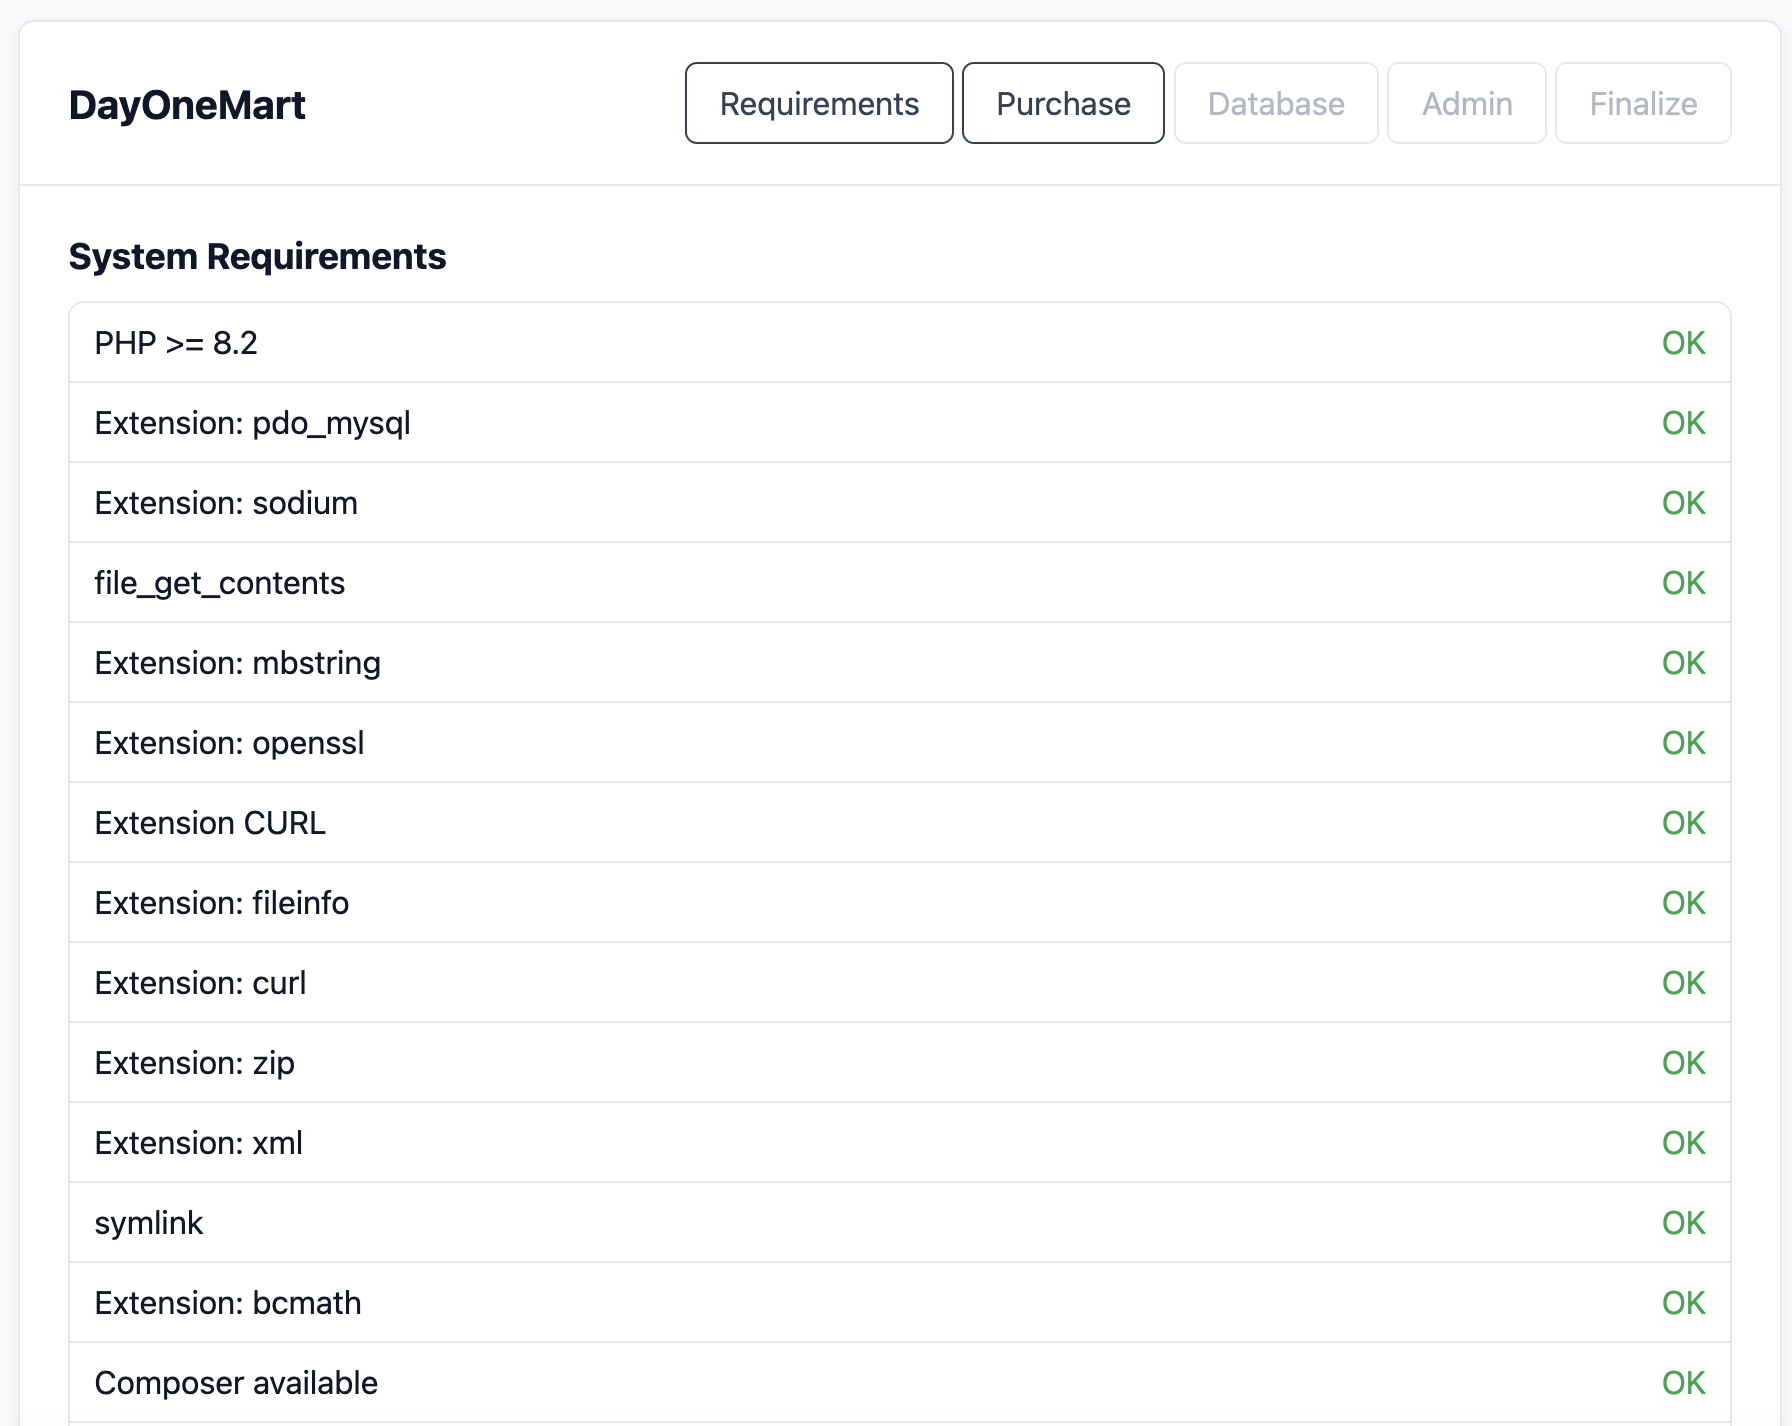
Step 1 — System Requirements Check
The installer verifies your server meets all requirements — PHP version, extensions, functions, and tool availability. All checks must show OK before you can proceed.
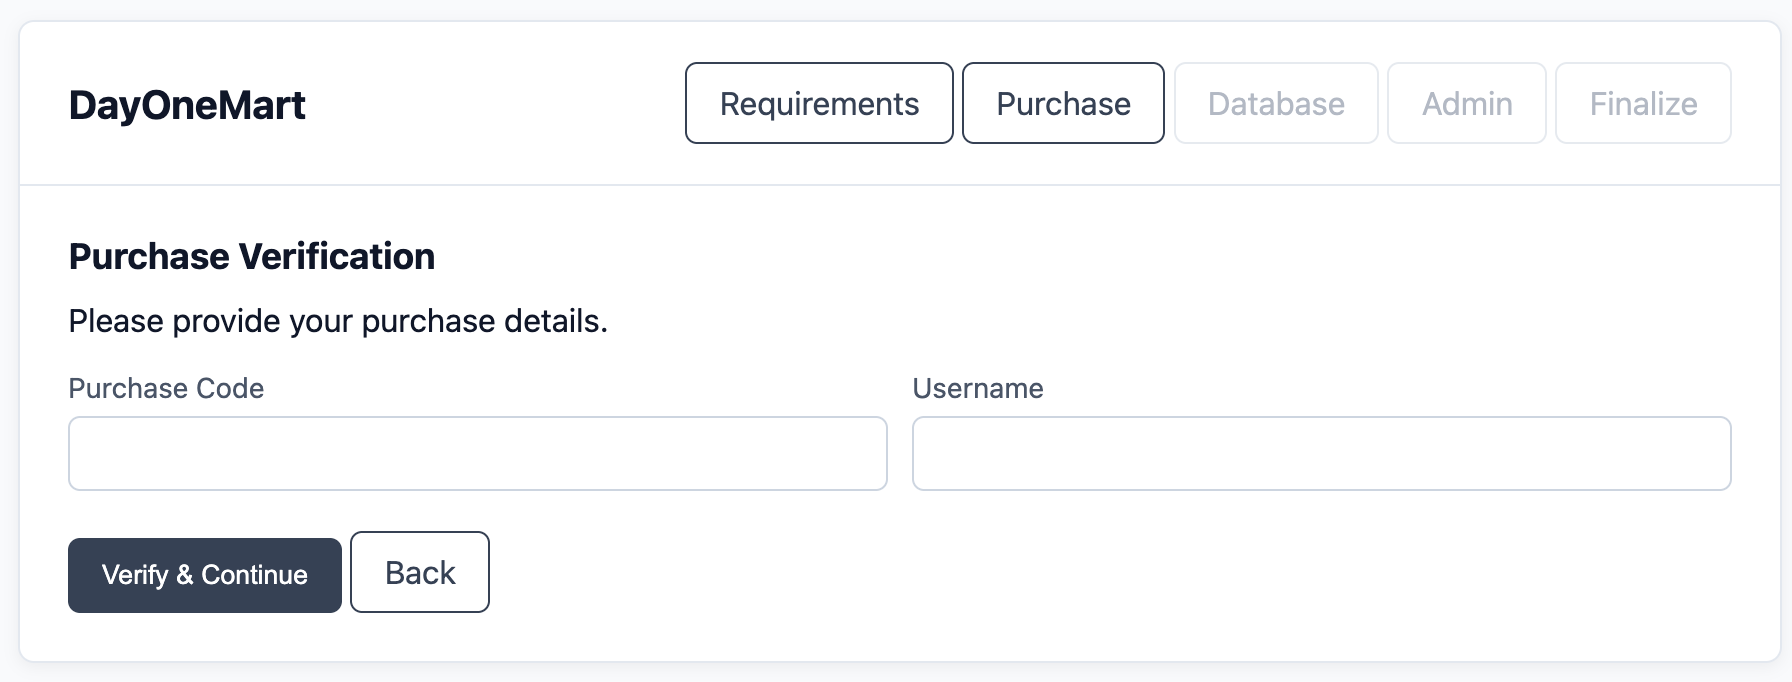
Step 2 — Purchase Verification
Enter your purchase code and username.
Click Verify & Continue to validate your license. Upon success, the
PURCHASE_VERIFIED=true flag is written to .env.
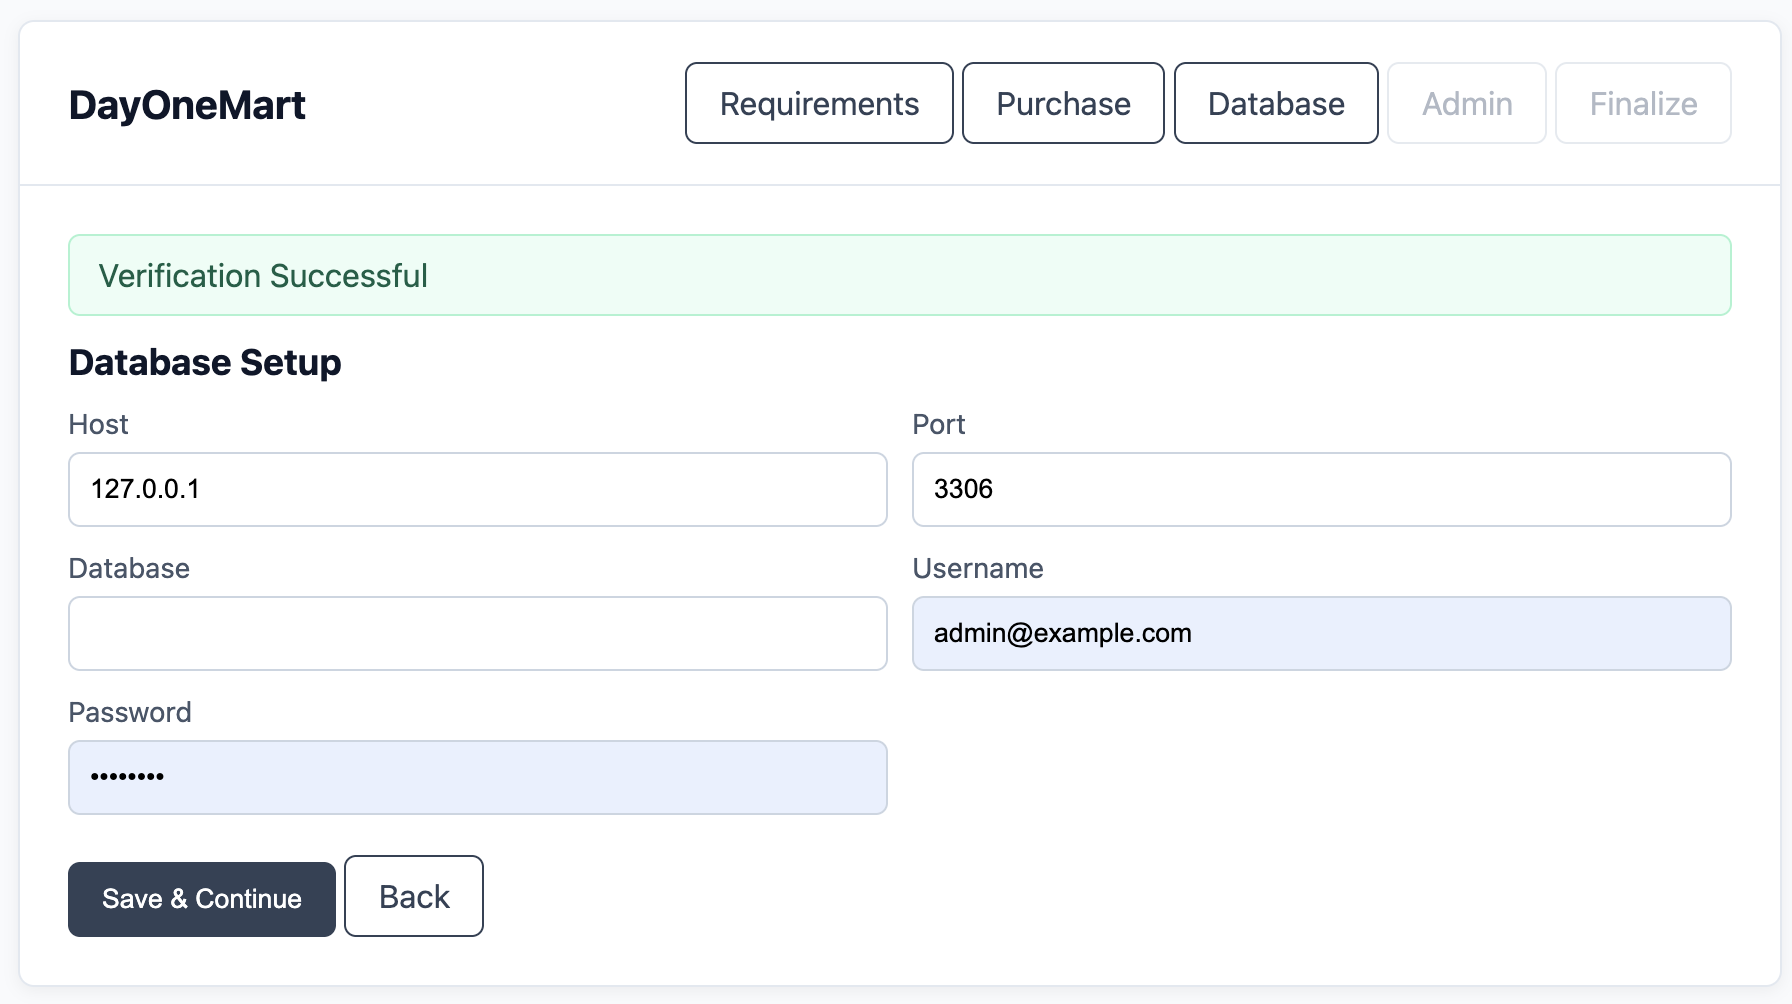
Step 3 — Database Configuration
Enter your MySQL connection details — Host, Port,
Database name, Username, and Password.
The installer tests the connection live before saving. On success, it writes the credentials
to .env and automatically runs all database migrations.
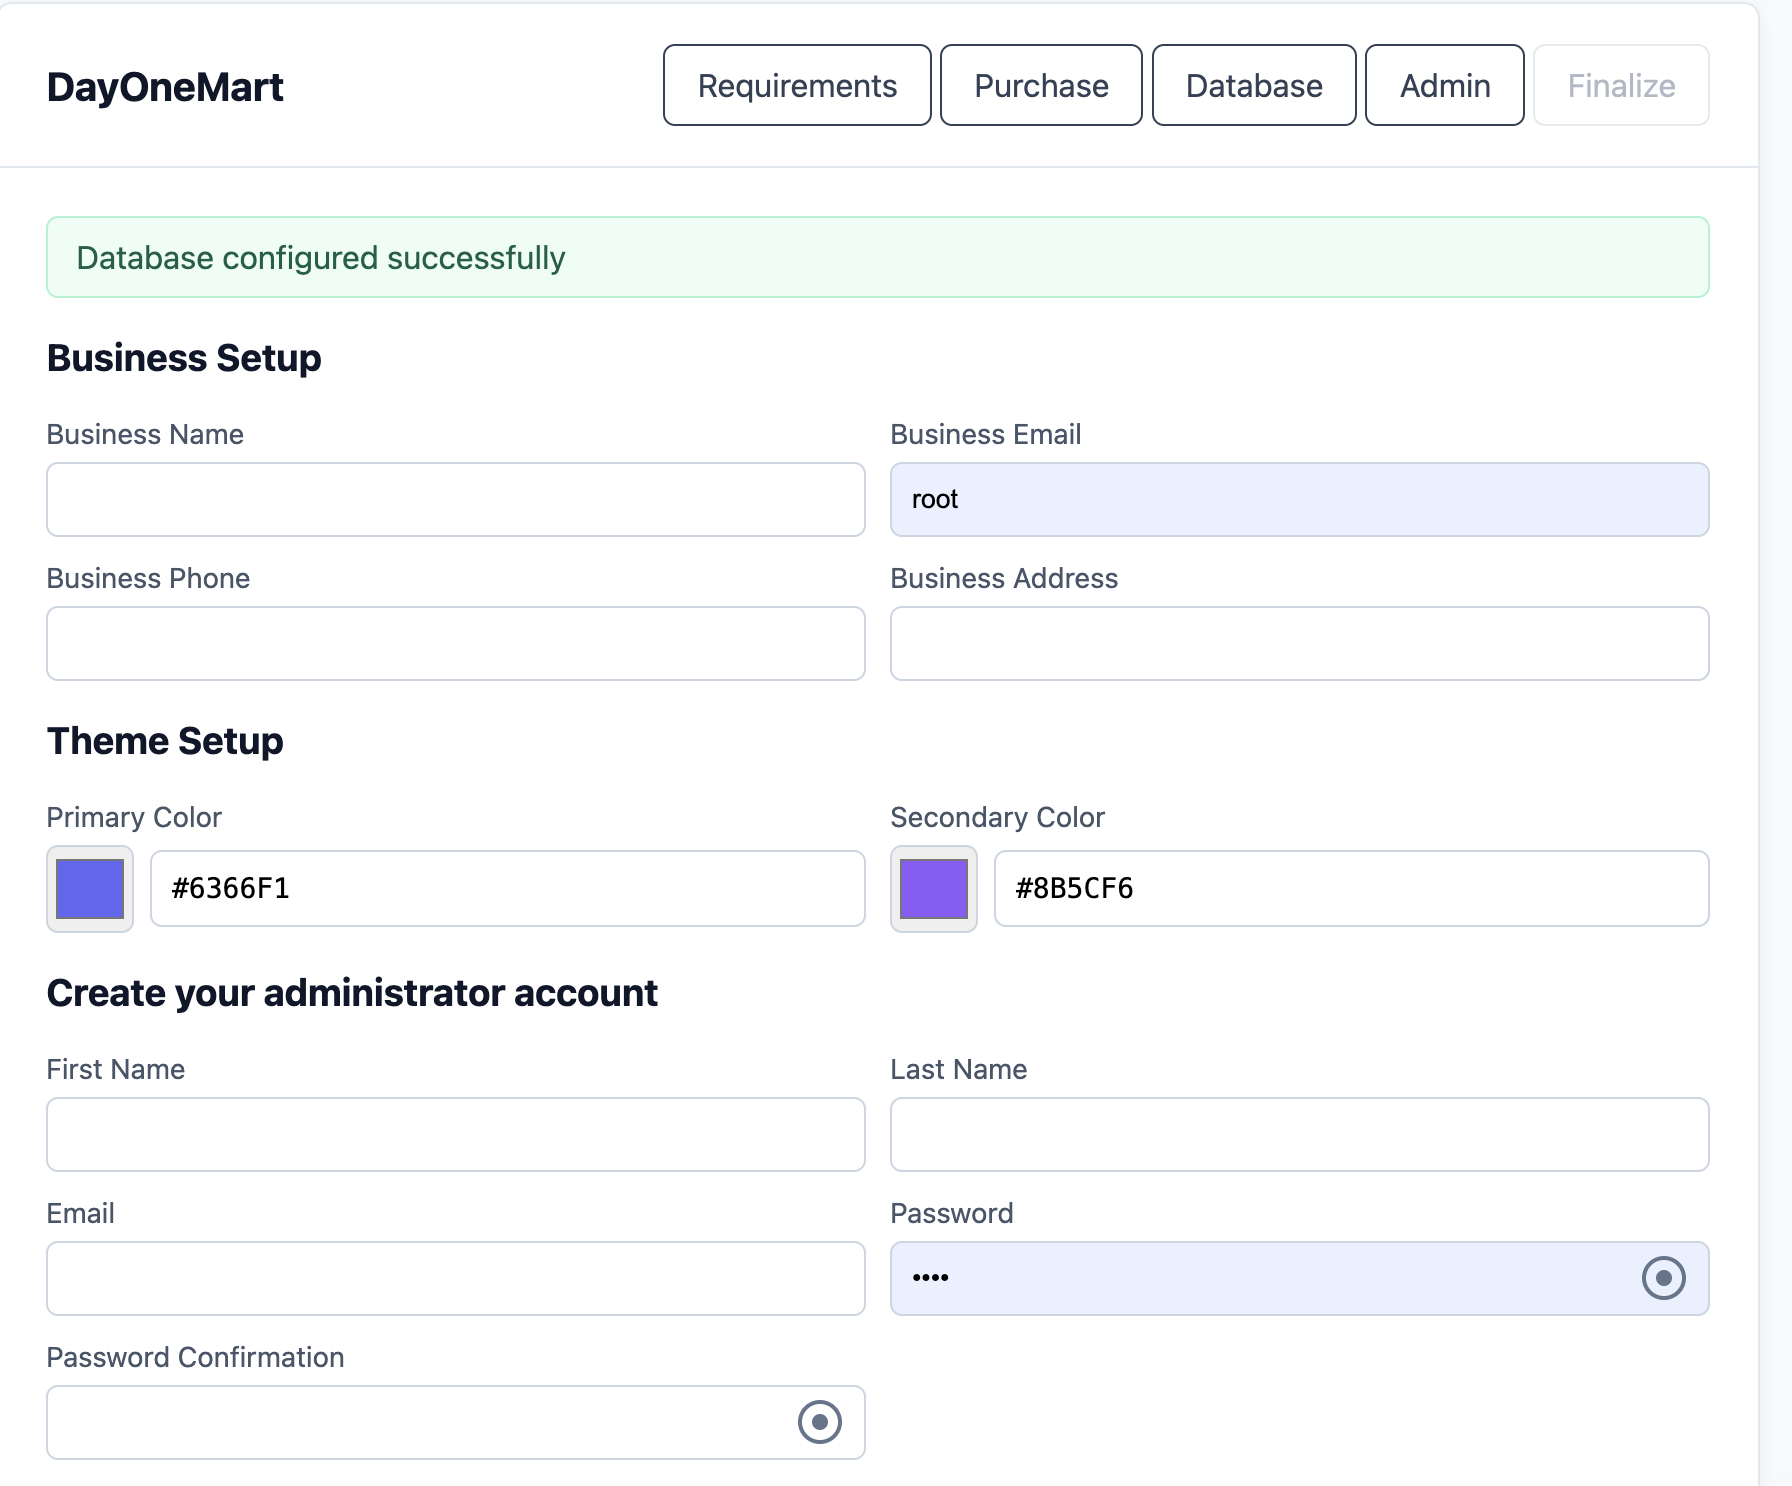
Step 4 — Business & Admin Setup
Configure your business and create the super-admin account on this page:
- Business Setup: Business name, email, phone, and address
- Theme Setup: Primary color and secondary color (hex values, e.g.
#6366F1) - Administrator Account: First name, last name, email, password, and password confirmation (min 8 characters)
The installer creates the business record, the admin user, and runs essential seeders (currencies, website setup, general settings, push notification setup, email templates, modules).
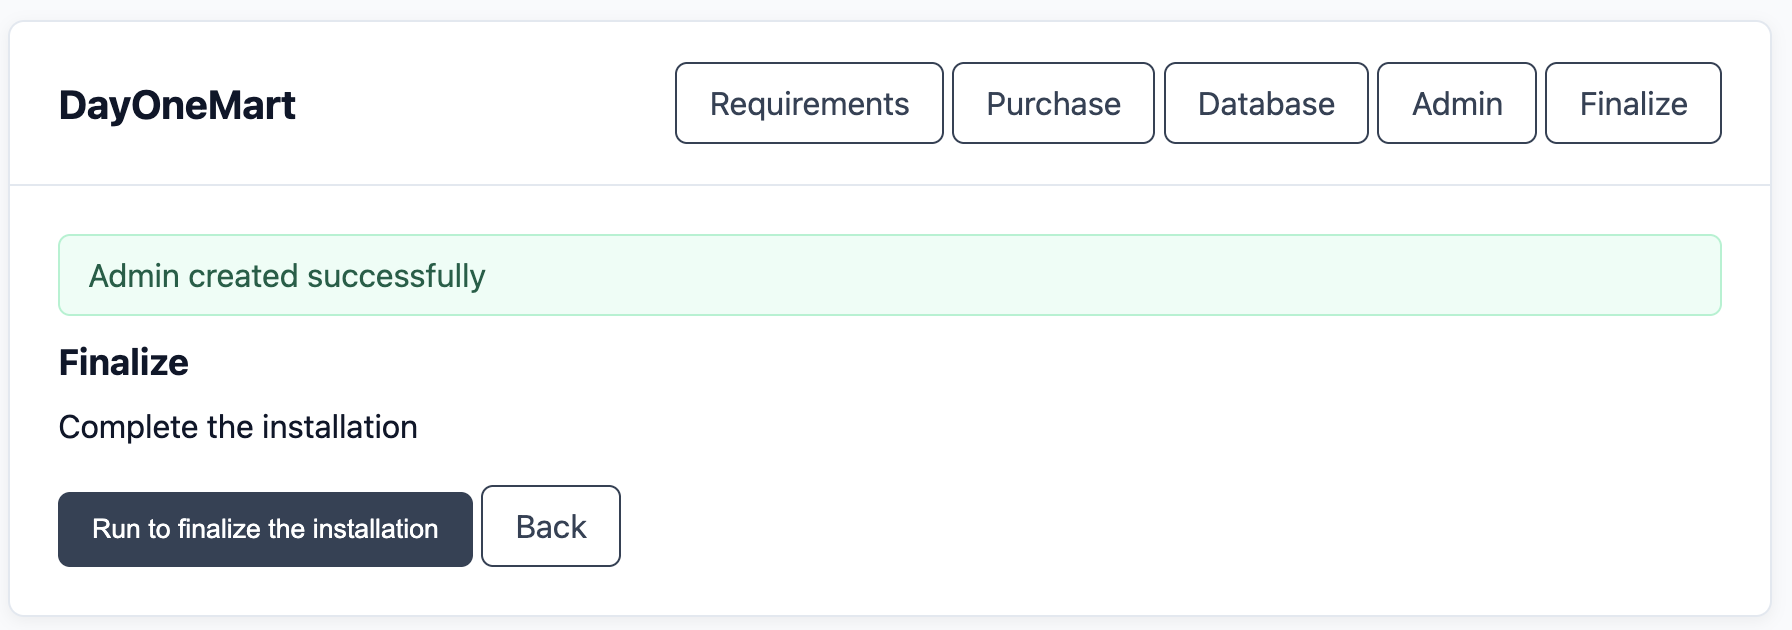
Step 5 — Finalize Installation
Click Run to finalize the installation to complete the setup. The installer automatically:
- Generates the app key if not already set
- Clears all cached config, routes, and views
- Creates the
public/storagesymlink - Sets
INSTALLED=true,APP_ENV=production,APP_DEBUG=false - Sets
APP_URLto your current domain automatically
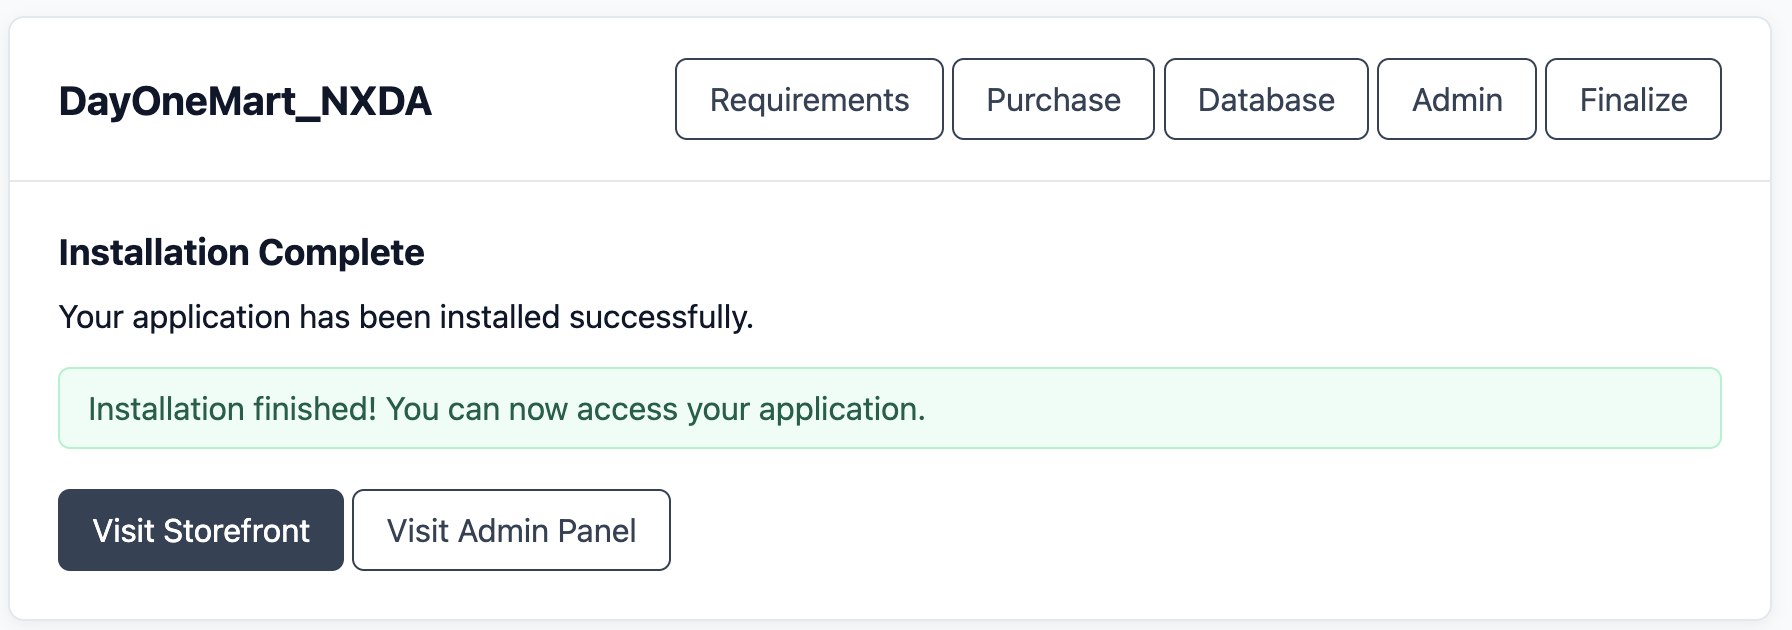
Installation Complete
Once finalized, the success screen appears with links to visit the Storefront or the Admin Panel. Your application is now live.
INSTALLED=true, the /install routes are
disabled by the notInstalled middleware. The installer cannot be re-run unless
you manually set INSTALLED=false in .env.
Post-Install Production Commands
# Cache for production performance
php artisan config:cache
php artisan route:cache
php artisan view:cache

# Start queue worker (use Supervisor in production)
php artisan queue:work --sleep=3 --tries=3 --max-time=3600

# Optional: Start Octane for high performance
php artisan octane:start
Basic Configuration
Core .env Variables
Most of these are configured automatically by the installer wizard. Key values to review after installation:
# Application (set automatically by installer)
APP_NAME=DayOneMart
APP_ENV=production
APP_KEY=base64:YOUR_GENERATED_KEY
APP_DEBUG=false
APP_URL=https://yourdomain.com

# Locale
APP_LOCALE=en
APP_FALLBACK_LOCALE=en

# Database (set by installer wizard — Step 3)
DB_CONNECTION=mysql
DB_HOST=127.0.0.1
DB_PORT=3306
DB_DATABASE=onemart
DB_USERNAME=onemart_user
DB_PASSWORD=strong_password_here

# Session & Cache
SESSION_DRIVER=file
CACHE_STORE=file
QUEUE_CONNECTION=sync

FILESYSTEM_DISK=local

# Octane (optional — remove if not using Swoole)
OCTANE_SERVER=swoole

# JWT (generated via: php artisan jwt:secret)
JWT_SECRET=your_jwt_secret_here

# License (set automatically by installer)
INSTALLED=true
SOFTWARE_ID=20000000
PURCHASE_VERIFIED=true
PURCHASE_CODE=your_purchase_code
PURCHASE_USERNAME=your_username
.env file directly.
Mail Configuration
Supported mail drivers and their key variables:
| Driver | MAIL_MAILER value | Notes |
|---|---|---|
| SMTP | smtp | Any SMTP server (Gmail, custom) |
| Mailgun | mailgun | Set MAILGUN_DOMAIN + MAILGUN_SECRET |
| AWS SES | ses | Set AWS credentials |
| Sendmail | sendmail | Server sendmail binary |
| Log (dev) | log | Writes emails to storage/logs |
Storage Configuration
By default the application uses the local disk (storage/app/public).
To switch to AWS S3, set FILESYSTEM_DISK=s3 and fill in the AWS_*
variables in .env. No other code changes are needed.
Server Configuration
Nginx (Recommended)
server {
    listen 80;
    listen [::]:80;
    server_name yourdomain.com www.yourdomain.com;
    return 301 https://$host$request_uri;
}

server {
    listen 443 ssl http2;
    listen [::]:443 ssl http2;
    server_name yourdomain.com www.yourdomain.com;

    root /var/www/onemart/public;
    index index.php;

    ssl_certificate     /etc/ssl/certs/yourdomain.crt;
    ssl_certificate_key /etc/ssl/private/yourdomain.key;

    add_header X-Frame-Options "SAMEORIGIN";
    add_header X-XSS-Protection "1; mode=block";
    add_header X-Content-Type-Options "nosniff";

    charset utf-8;

    location / {
        try_files $uri $uri/ /index.php?$query_string;
    }

    location ~ \.php$ {
        fastcgi_pass unix:/var/run/php/php8.3-fpm.sock;
        fastcgi_index index.php;
        fastcgi_param SCRIPT_FILENAME $realpath_root$fastcgi_script_name;
        include fastcgi_params;
    }

    location ~ /\.(?!well-known).* {
        deny all;
    }
}
fastcgi_pass block above with a reverse proxy to the Octane server:
proxy_pass http://127.0.0.1:8000;
Apache (.htaccess)
The public/.htaccess file ships with the application. Ensure mod_rewrite is enabled:
a2enmod rewrite
systemctl restart apache2
SSL / HTTPS
Use Certbot (Let's Encrypt) for a free SSL certificate:
apt install certbot python3-certbot-nginx
certbot --nginx -d yourdomain.com -d www.yourdomain.com
Queue Worker (Supervisor)
Create a Supervisor config to keep the queue worker running persistently:
# /etc/supervisor/conf.d/onemart-worker.conf

[program:onemart-worker]
process_name=%(program_name)s_%(process_num)02d
command=php /var/www/onemart/artisan queue:work --sleep=3 --tries=3 --max-time=3600
autostart=true
autorestart=true
stopasgroup=true
killasgroup=true
user=www-data
numprocs=2
redirect_stderr=true
stdout_logfile=/var/log/onemart-worker.log
stopwaitsecs=3600
supervisorctl reread
supervisorctl update
supervisorctl start onemart-worker:*
Cron Job
Add the Laravel scheduler to your crontab (crontab -e):
* * * * * cd /var/www/onemart && php artisan schedule:run >> /dev/null 2>&1
CORS Configuration
CORS headers are managed by Laravel's built-in CORS middleware (config/cors.php).
If the Flutter apps or external services cannot reach the API, verify:
allowed_originsincludes your Flutter app's origin (or*for development)allowed_methodsincludesGET, POST, PUT, DELETE, OPTIONSallowed_headersincludesAuthorization, Content-Type, X-Requested-With, X-localization- For production, restrict
allowed_originsto your actual domains
Deployment
First-Time Deploy
# 1. Install PHP dependencies
composer install --optimize-autoloader --no-dev

# 2. Build frontend assets
npm ci
npm run build

# 3. Run migrations and seeders
php artisan migrate --force
php artisan db:seed --force

# 4. Create storage symlink
php artisan storage:link

# 5. Cache everything for production
php artisan config:cache
php artisan route:cache
php artisan view:cache
php artisan event:cache

# 6. Set permissions
chmod -R 775 storage bootstrap/cache
chown -R www-data:www-data .
Subsequent Deploys
# Pull latest code
git pull origin main

# Refresh dependencies
composer install --optimize-autoloader --no-dev
npm ci && npm run build

# Run new migrations
php artisan migrate --force

# Clear caches then rebuild
php artisan optimize:clear
php artisan optimize

# Restart Octane / queue workers
php artisan octane:reload   # if using Octane
supervisorctl restart onemart-worker:*
Post-Deploy Checklist
- Visit the storefront homepage and confirm products render
- Log in to the admin panel and verify the dashboard loads
- Place a test order end-to-end
- Check queue worker is processing jobs (
php artisan queue:monitor) - Verify email notifications are delivered
- Test push notifications are delivered (Firebase)
- Confirm file uploads and storage links work
cPanel / Shared Hosting
Step 1 — Create a Database
- Open cPanel → MySQL Database Wizard
- Create a new database (e.g.
youruser_onemart) - Create a database user and set a strong password
- Assign ALL PRIVILEGES to the user on that database
Step 2 — Upload & Extract Files
- Open cPanel → File Manager
- Upload
install.zipto/home/youruser/(abovepublic_html) - Extract the archive — this creates a project folder (e.g.
/home/youruser/onemart/)
Step 3 — Set the Document Root
Laravel requires the domain to point to the /public folder. On cPanel you have two options:
Option A — Subdomain / Addon Domain (Recommended)
- Go to cPanel → Domains (or Subdomains / Addon Domains)
- Set the document root to
/home/youruser/onemart/public - This is the cleanest approach — no file moving required
Option B — Move Public Files (if document root cannot be changed)
- Move all contents from
/onemart/public/into/public_html/ - Edit
public_html/index.phpand update the paths:
// Change these two lines:
require __DIR__.'/../vendor/autoload.php';
$app = require_once __DIR__.'/../bootstrap/app.php';

// To point to the project folder:
require __DIR__.'/../onemart/vendor/autoload.php';
$app = require_once __DIR__.'/../onemart/bootstrap/app.php';
Step 4 — Set Permissions
Via cPanel → Terminal (SSH) or File Manager:
cd /home/youruser/onemart
chmod -R 775 storage bootstrap/cache
chmod 644 .env
Step 5 — Install Dependencies
The install package does not include the vendor/ folder, so you must
generate it with composer update. Connect via SSH and run:
cd /home/youruser/onemart
composer update --optimize-autoloader --no-dev
cp .env.example .env
php artisan key:generate
php artisan jwt:secret
composer update on
your local machine and upload the resulting vendor/ folder via File Manager / FTP.
Step 6 — Build Frontend Assets
If your hosting provides Node.js via SSH:
npm install
npm run build
public/build/ folder via File Manager or FTP.
Step 7 — Run the Installer Wizard
- Visit
https://yourdomain.com/install/requirementsin your browser - Follow the 5-step wizard: requirements check → purchase verification → database setup → business & admin setup → finalize
Step 8 — Create the Storage Symlink
php artisan storage:link
symlink() is disabled on your hosting, manually create the link via
File Manager or ask your hosting provider to enable it.
Step 9 — Set Up the Cron Job
- Open cPanel → Cron Jobs
- Set the interval to Once Per Minute (* * * * *)
- Enter the command:
php /home/youruser/onemart/artisan schedule:run >> /dev/null 2>&1
Step 10 — Production Optimization
php artisan config:cache
php artisan route:cache
php artisan view:cache
cPanel Limitations
| Feature | VPS / Dedicated | Shared Hosting |
|---|---|---|
| Laravel Octane (Swoole) | Available | Not available |
| Push Notifications (Firebase) | Available | Available |
| Supervisor (queue workers) | Available | Not available — use QUEUE_CONNECTION=sync |
| Custom Nginx config | Full control | Not available — uses Apache |
| Node.js / npm | Available | May not be available — build locally |
Update Procedure
Using the Built-in Updater (Recommended)
/updater.
vendor/ folder.
After the updater finishes, you must run composer update via SSH so the new
PHP dependencies are installed — otherwise the application may fail to boot or behave
unpredictably after the update.
-
Back up your database Go to Admin Panel → Settings → System → Database Backup and download a fresh backup.
-
Navigate to the updater Visit
https://yourdomain.com/updaterwhile logged in as admin. -
Upload the update ZIP file Download the latest update package and upload it via the updater. The file is uploaded in chunks for reliability on large updates.
-
Run the update Click the update button. The updater extracts files, runs migrations, and clears caches automatically. You will be redirected to a success page upon completion.
-
Regenerate the
vendor/folder Connect via SSH and runcomposer updatein the project root to install the new PHP dependencies that ship with the update:cd /path/to/onemart composer update --optimize-autoloader --no-dev php artisan optimize:clear php artisan optimize
On shared hosting without SSH/Composer, runcomposer updatelocally and upload the regeneratedvendor/folder via File Manager or FTP.
Manual Update via SSH
The update ZIP does not contain the vendor/ folder — Step 4
below regenerates it with composer update. Skipping that step will leave the
site broken.
# 1. Put application in maintenance mode
php artisan down --message="Updating, back in 5 minutes" --retry=300

# 2. Backup database
mysqldump -u root -p onemart > backup_$(date +%Y%m%d).sql

# 3. Extract and overwrite files (keep your .env and storage/)
# Do NOT overwrite .env or storage/

# 4. Regenerate vendor/ and rebuild frontend assets
#    (the update package does not ship with vendor/)
composer update --optimize-autoloader --no-dev
npm ci && npm run build

# 5. Run migrations
php artisan migrate --force

# 6. Rebuild cache
php artisan optimize:clear && php artisan optimize

# 7. Bring application back online
php artisan up
Localization
The application supports 5 languages out of the box with full RTL support for Arabic:
| Language | Code | Backend | Admin Frontend | Storefront |
|---|---|---|---|---|
| English | en | lang/en/ | AdminPanel/locales/en.json | StoreFront/locales/en.json |
| Bengali | bn | lang/bn/ | AdminPanel/locales/bn.json | StoreFront/locales/bn.json |
| Hindi | hi | lang/hi/ | AdminPanel/locales/hi.json | StoreFront/locales/hi.json |
| Arabic | ar | lang/ar/ | AdminPanel/locales/ar.json | StoreFront/locales/ar.json |
| Spanish | es | lang/es/ | AdminPanel/locales/es.json | StoreFront/locales/es.json |
Adding a New Language
-
Backend: Copy the
lang/en/folder tolang/{code}/and translate all PHP files. -
Admin frontend: Copy
resources/js/AdminPanel/locales/en.jsonto{code}.jsonand translate. -
Storefront: Copy
resources/js/StoreFront/locales/en.jsonto{code}.jsonand translate. -
Sort locale files: Run
npm run sort:localesto ensure consistent key ordering across all files.
API Reference
The application ships with a complete Postman collection
(postman-collection.json, ~485 KB) covering all API endpoints.
Import it into Postman or Insomnia for interactive exploration.
Base URL & Versioning
Base URL:  https://yourdomain.com/api/v1
Auth:      Bearer JWT token (Authorization: Bearer {token})
Customer API Endpoints
| Group | Endpoints |
|---|---|
| Authentication | login, OTP login, sign-up, forgot-password, verify-OTP, reset-password, Google / Facebook / Apple social login, logout, refresh, check-user-exists |
| App Config | home screen, app config, geocode-reverse, place-autocomplete, map-place-details, map-direction |
| Products | list, detail, by-category, search, featured, popular, recommended |
| Categories | list, show, featured, popular |
| Cart | get, add, update quantity, update item, remove |
| Checkout | place-order, apply-delivery-charge, coupon apply/remove |
| Orders | list, show, cancel, track (public), invoice, history |
| Wallet | show, add-money |
| Loyalty Points | config, histories, redeem |
| Notifications | list, unread count, mark-read, mark-all-read, delete, preferences |
| Chat | list, start-chat, show, messages, send-message |
| Profile | show, update, change-password, delete-account, settings |
| Addresses | CRUD delivery addresses |
| Wishlist | list, add, delete |
| Reviews | CRUD product reviews |
| Refund Requests | list, show, store, cancel |
Admin API Endpoints
| Group | Endpoints |
|---|---|
| Auth | login, verify-2FA, logout, refresh |
| Dashboard | summary stats, recent orders, real-time data |
| Products & Menu | items, categories, sub-categories, cuisines, labels, menu-types, addons — full CRUD + status toggle |
| Orders | list, show, update status, assign deliveryman, cancel, refund, bulk actions |
| Users | customers, deliverymen, employees — CRUD, bulk actions, role management |
| Promotions | coupons, flash sales — full CRUD + status |
| Notifications | create, send, bulk actions, mark-seen |
| Settings | business setup, payment gateways, SMS gateways, Firebase, social auth, email, tax, currency, delivery charges, cookies, marketing tools |
| Analytics | sales, category performance, user activity |
| System | cache clear, env variable CRUD, DB backups |
Deliveryman API Endpoints
| Group | Endpoints |
|---|---|
| Auth | login, OTP login, forgot-password, verify-OTP, reset-password, logout, refresh |
| Dashboard | summary stats, earnings, delivery overview |
| Orders | list assigned orders, show details, update status, accept/reject |
| Profile | show, update, FCM token, change-password, delete-account, settings |
| Chat | list, conversations, messages, send-message |
| Notifications | list, mark-read, mark-all-read, delete |
| Config | app config, terms, support, map-direction |
Troubleshooting
500 — Internal Server Error
- Check
storage/logs/laravel.logfor the root cause - Set
APP_DEBUG=truetemporarily in.envto see the exception in the browser - Run
php artisan config:clear && php artisan cache:clear - Verify
storage/andbootstrap/cache/are writable by the web server
Vite Manifest Not Found
npm install
npm run build
php artisan view:clear
Images / Uploads Not Showing
php artisan storage:link
# If the symlink already exists but is broken:
rm public/storage
php artisan storage:link
404 — Page Not Found
- Confirm the Nginx/Apache document root points to
/public - For Nginx: ensure
try_files $uri $uri/ /index.php?$query_string;is present - For Apache: confirm
mod_rewriteis enabled andAllowOverride Allis set
Emails Not Sending
- Verify
MAIL_*variables in.envare correct - Ensure the queue worker is running (
php artisan queue:work) - Check
storage/logs/laravel.logfor mail errors - Test with
php artisan tinker:Mail::raw('test', fn($m) => $m->to('test@example.com'));
CSRF Token Mismatch
- Clear browser cookies and try again
- Verify
APP_URLin.envmatches the actual domain (includinghttps://) - Run
php artisan config:clear
Queue Jobs Not Processing
# Check if queue worker is running
supervisorctl status onemart-worker:*

# Restart if needed
supervisorctl restart onemart-worker:*

# Run manually to debug
php artisan queue:work --verbose
Push Notifications Not Working
- Verify Firebase credentials are configured correctly in Admin Panel → Settings → Firebase
- Ensure the Firebase service account JSON file is uploaded and valid
- Check that the FCM server key matches your Firebase project
- Confirm the device has granted notification permissions
- Check
storage/logs/laravel.logfor FCM errors
Permission Errors
chmod -R 775 storage bootstrap/cache
chown -R www-data:www-data storage bootstrap/cache
Customization
Backend — Controllers & Services
- API controllers live in
app/Http/Controllers/Api/ - Business logic is extracted to
app/Services/ - Eloquent models are in
app/Models/ - Follow standard Laravel conventions — register new routes in
routes/api/v1/
Frontend — Vue & Tailwind
- Admin panel pages:
resources/js/AdminPanel/Pages/ - Storefront pages:
resources/js/StoreFront/Pages/ - Shared components:
resources/js/components/ - Add Shadcn components:
npm run shadcn:adminornpm run shadcn:storefront - Tailwind config is driven by CSS variables — edit
resources/css/app.cssto change the color scheme - After changes, rebuild with
npm run build
Translations / i18n
- Backend translations:
lang/{en,bn,hi,ar,es}/ - Admin frontend locales:
resources/js/AdminPanel/locales/ - Storefront locales:
resources/js/StoreFront/locales/ - Sort locale files after editing:
npm run sort:locales
Adding a Payment Gateway
-
Create the controller in
app/Http/Controllers/Payment/implementing the gateway's webhook and redirect callbacks. -
Register routes in
routes/payment.php. -
Add the gateway to settings — register it in the admin panel's payment gateway list and add the necessary
.envvariables.
Email Templates
Laravel Mailable classes are in app/Mail/. Blade email views are in
resources/views/emails/. Customize the HTML/CSS directly in those files.
Development Workflow
# Start all dev services concurrently (PHP server + queue listener + logs + Vite)
composer dev

# Or start individually:
php artisan serve                    # PHP dev server on port 8000
npm run dev                          # Vite dev server with HMR
php artisan queue:listen --tries=1   # Queue listener
php artisan pail                     # Tail logs in terminal

# Optional services:
php artisan octane:start             # Octane performance server (if enabled)
Need help? Contact contact@6amtech.com or visit our website for support.